Be A Do-Gooder & Send Thank You Notes
One thing a southern lady does well is get involved in her community. Our mothers and grandmothers always lend a hand at church or at the school. They show up to fundraisers and offer to gather donations, deliver food to the elderly, or drop off a casserole at a potluck fundraiser. These are no-brainers for a typical southern hostess. She thrives on cooking and entertaining, so why not donate those skills to a charitable cause?
There are times when a thank you note is absolutely required (such as when you receive a wedding present), but if you’re a southern woman, there are other times when a thank you note can be sent. Did someone send your family food or a gift after a hardship? Did someone throw you a lovely bridal shower? Did someone let you borrow their car when yours was in the shop? Did someone bring food to your door when you or the kids were sick? These are all times when it’s not required to send a note. The person who helped you loves you and wouldn’t want you to have a second thought about it. Still, it’s a nice way to show someone how grateful you are and that you are happy to have them in your life.
P.S. Thank you notes are also monogrammed.
You Wait For An Invitation
Parties, weddings, and other social events require a lot of very careful planning on the host’s part, and you should never attend anything without an invitation. Invitations can range from a “hey, we’re having a wine night, come over!” text from your friend to a Facebook invite, to a formal wedding invitation in the mail, but they should all be equally respected. If you’re not invited to a wedding, the bride’s family could be on a very tight budget and simply couldn’t afford to invite everyone they wanted to. If someone doesn’t invite you to a party, maybe your ex will be there, and they are saving you from any awkwardness. If someone intentionally is leaving you out, who cares? You don’t want to be around that person anyway! The point is, there is always a reason why an invitation was extended to you or not. A southern woman always respects the decision of the host and does not make them feel guilty or embarrassed about their choice.
Now, once you receive that invitation, you better respond. If they spent the time inviting, you spend the time responding in a timely manner and, while you’re at it, offer to help. And remember, never show up empty-handed. Even if it’s a bottle of wine, you better bring a gift to signify your gratitude for being invited. A hostess goes through a lot of trouble to throw a nice party. Show your appreciation.
You Dress Appropriately & Know How To Hold A Proper Conversation


Honorable mention tip #1:
Never leave the house without lipstick. You can cover your eyes with shades, but you better have your lips on.
Honorable mention tip #2:
Keep your purse and your shoes beside the bed. In the unlikely event of a fire or a tornado, you don’t want to be standing outside your house barefoot and without your purse.
Know How To Make Biscuits & A Pie Crust from Scratch
Look, I am guilty as charged that even as a professional chef, I sometimes get help from the pre-made section. But there are two things that are just better from scratch. I showed up to Thanksgiving with a pie in a pre-made pie crust in my 20s, and I thought my grandmother was going to melt me with her eyes. But, as any proper southern lady would do, she smiled and served the pie. After everyone left, she pulled me into the kitchen and said, “Let me show you how to make a proper pie crust.” On the note of biscuits, there’s more than one way to skin a cat. (southern term for more than one way to do something) Before my time, my great-grandmother had a cafe and was the biscuit queen. If there was one thing always on her table, it was hot biscuits. She had a big bowl in her pantry with a tea towel (monogrammed, of course) draped over it at all times, with flour ready to make biscuits at a moment’s notice. Now, I have seen thousands of recipes over the years and in my time as a chef, but some things remain true in biscuit making.
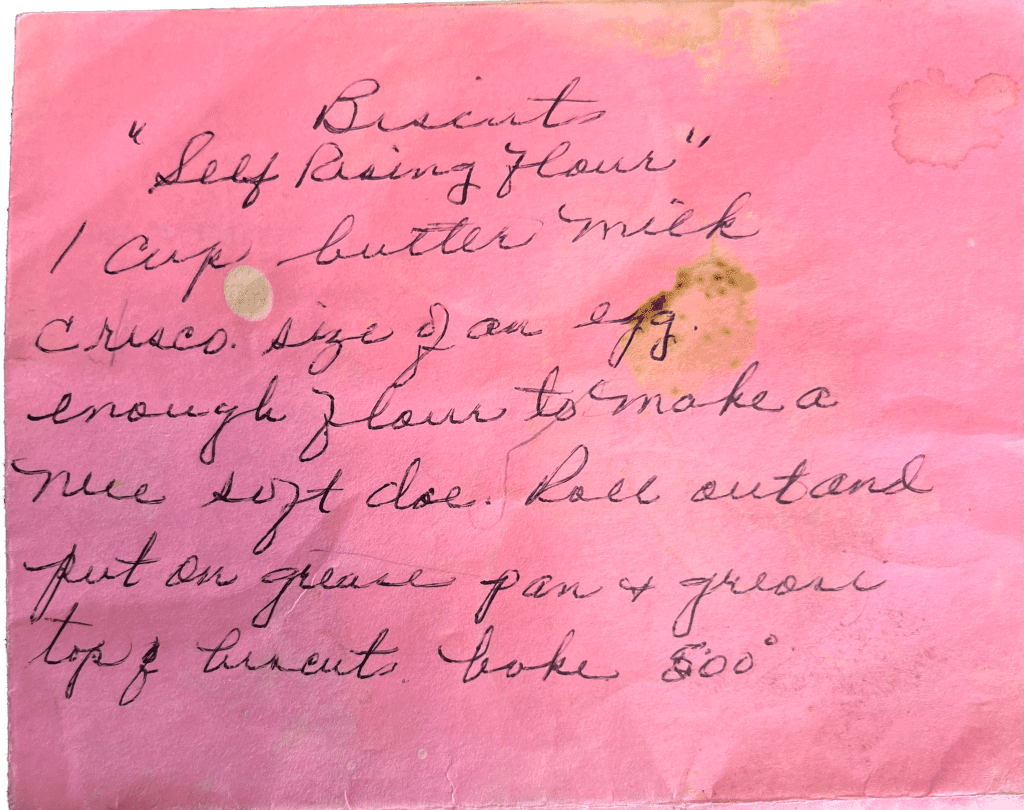

Don’t over-mix the flour once the liquid has been added, or the texture will be tough. This never made sense to me as a child; I just followed directions. Now I know that you don’t over-mix so as not to develop the gluten, which is why you knead a bread dough, to develop a certain elasticity. That is unacceptable in a biscuit. Same with a cake batter and a scone!!!
Laminate the dough. Roll it out softly, then fold it over on itself to create fluffy layers. This isn’t required, but it will result in a taller biscuit.
Never twist the cutter. You don’t want to seal off the edges; that prevents it from rising up tall and fluffy. Now, this is a controversy among biscuit makers. My great-grandmother twisted the cutter, and her biscuits (the ones I made today) are not tall. They are still fluffy in the center, but they are shorter and disk-like. When I make biscuits for catering or the restaurant, I DO NOT twist the cutter, and I cram them in that pan like sardines because I want a huge fluffy biscuit. On the other hand, when I make them for family, they expect Bessie’s recipe, so twist the cutter. It all comes down to personal preference.
Pie crusts aren’t much different. It’s the same concept with cold butter mixed into the flour until it resembles a meal. Once you add the cold water, softly combine it without over-mixing. Always butter your pie dish. Every southern lady has at least two pyrex glass pie dishes. Now, I am no stranger to a disposable foil pan, trust me, but when entertaining in your home, that is a major faux pas.
While we are on the subject of pie, my grandmother’s pecan pie is famous around these parts. She claims it’s a secret, but she tells everyone. The recipe is on the back of the Karo syrup bottle; only she makes a couple of tweaks that I’ve listed below in the recipe. I asked her once, “If Karo has printed this recipe on every single bottle for decades, why does it need tweaking?” She responded, “Because it’s made in Chicago, what do they know!”
And while we are on the subject it’s, pe-CAHN, not PEE-can!
Perfect Pie Crust
12 tablespoons (1 1/2 sticks)
very cold unsalted butter
3 cups all-purpose flour
1 teaspoon kosher salt
1 tablespoon sugar
1/3 cup very cold vegetable shortening
6 to 8 tablespoons (about 1/2 cup) ice water
Dice the butter and return it to the refrigerator while you prepare the flour mixture. Place the flour, salt, and sugar in the bowl of a food processor fitted with a steel blade and pulse a few times to mix. Add the butter and shortening. Pulse 8 to 12 times, until the butter is the size of peas. With the machine running, pour the ice water down the feed tube and pulse the machine until the dough begins to form a ball. Dump out on a floured board and roll into a ball. Wrap in plastic wrap and refrigerate for 30 minutes.
Cut the dough in half. Roll each piece on a well-floured board into a circle, rolling from the center to the edge, turning and flouring the dough to make sure it doesn’t stick to the board. Fold the dough in half, place in a pie pan, and unfold to fit the pan. Repeat with the top crust if using a top.
Louise’s Pecan Pie
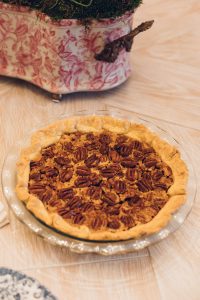

3 eggs
1 cup light Karo syrup
1 tbsp AP flour
2 tbsp butter, melted but not hot
1 tbsp bourbon vanilla
2 cups pecans, we prefer pieces
1 unbaked pie crust, recipe follows
Preheat oven to 320 degrees.
Hand whip the eggs and sugar in a medium bowl, then add the flour, Karo, butter, and vanilla. Mix well.
Fold in the pecans until coated.
Pour in prepared pie crust and bake for 70-80 minutes until the crust is brown and the pie is set in the center. You’ll be able to tell because the pecans will resemble a candied look on top. Let it cool for an hour or two before slicing.
This low-and-slow method ensures a crunchy pecan and a center that doesn’t run out. That’s how we like it in my family, and it always wows everyone that tries it.
Honorable
mention tip #3:
Things to keep in your purse: emergency money, lipstick, tape measure, and two safety pins (one big and one small). You never know when you’ll need a pin to hem or measure for a dress or picture frame.
Grandmother term:
Embroidery
New term:
Monogram
In the south, we monogram everything. Before there were fancy sewing machines with computers, our great-grandmothers would do needlepoint by hand. When I was a little girl, I remember her handing me the ring and the colorful thread and letting me stitch out the outlines of her designs. The beautiful patterns and different colored threads would bring a plain white napkin or pillowcase to life. You don’t see too much monogramming up north or even on the west coast. But walk into any nice home in Louisiana or any state in the SEC for that matter, and there will be monogrammed sheets on the bed. A monogrammed gift is always the go-to for a birthday, wedding, new baby, or even holidays in the south.
Quick Sautéed Collard Greens
1 large bunch collard greens
2 tablespoons olive oil
3 cloves garlic, minced
1/2 onion sliced thin
1 red bell pepper sliced thin
1/2 teaspoon red pepper flakes
kosher salt
ground black pepper
1/4 cup chicken broth
Wash the collard greens thoroughly. Remove the stems that run down the center by holding the leaf in your left hand and stripping the leaf down with your right hand. The tender young leaves in the heart of the collards don’t need to be stripped. Stack 6 to 8 leaves on top of one another, roll up, and slice into 1/2 inch thick slices.
Heat a large saute pan over medium high heat and add the olive oil. Once hot, add the onion, red bell pepper, garlic and red pepper flakes and saute until fragrant. Add the collard greens, and saute until bright green, about 4 minutes. Season with salt and pepper. Stir in the chicken broth and cook until the liquid evaporates, another 2 minutes.
Shrimp Creole
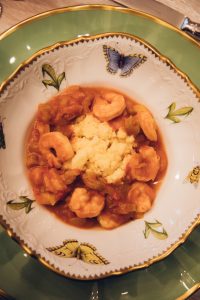

2 cups chopped onions
1 cup chopped green bell pepper
1 cup chopped celery
1 teaspoon salt
½ teaspoon cayenne pepper
2 bay leaves
one 14.5-ounce can diced tomatoes
1 tablespoon chopped garlic
1 teaspoon Worcestershire Sauce
1 teaspoon hot sauce,or to taste
2 tablespoons all-purpose flour
1 cup water
1 cup chicken stock
2 ½ pounds peeled and deveined large shrimp
1 tbsp creole seasoning (Tony’s or Emeril’s)
1/2 cup chopped green onions
2 tablespoons chopped parsley
4 cups cooked long-grain white rice or cheese grits
In a large saucepan, over medium heat, melt the butter. Add the onions, peppers, and celery to the pan. Season the vegetables with salt and cayenne. Saute the vegetables until they are wilted, about 6 to 8 minutes. Stir in the bay leaves, tomatoes, and garlic. Bring the mixture to a boil and reduce to a simmer; continue to cook for 15 minutes.
In a small bowl whisk the flour and water together and add the mixture to the tomatoes. Cook for 4 to 5 minutes. Add the shrimp stock, Worcestershire and hot sauce and continue to cook for 10 minutes longer. Season the shrimp with creole seasoning and add them to the pot. Cook the shrimp until they are pink and cooked through, about 6 to 7 minutes. Stir in the green onions and parsley.
Serve with white rice or cheese grits.
