


Want a quick and easy DIY project to get your house ready for holiday guests?
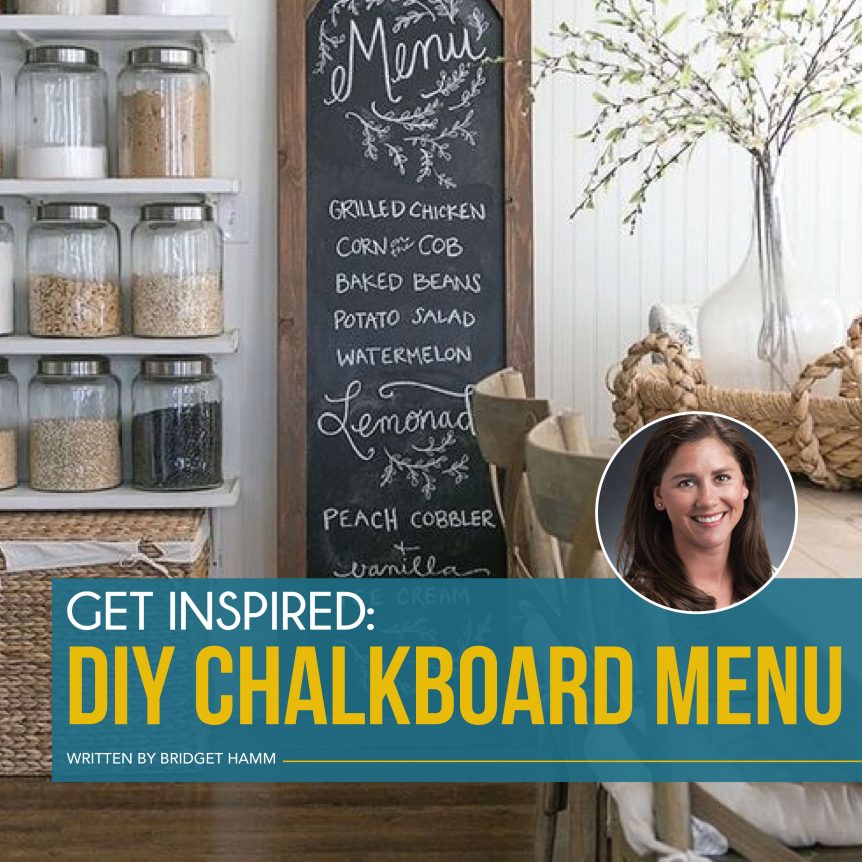
Paint a restaurant-inspired chalkboard to let all of your holiday guests know what you prepared (or ordered) for the special occasion.
How to get started:
Look throughout your house or at a favorite local store for framed mirrors, picture frames or beautiful molding that you love.
You have a few options at this point. You can chalkboard paint on an artist canvas, plywood or other surfaces that fit in your frame. Regardless of the type of surface, use sandpaper to rough it up especially if the surface is really smooth.
Don’t forget to spray primer (do not skip this important step) on the clean surface and allow it to dry before applying the chalkboard paint.
When the primer is completely dry, apply two coats of chalkboard paint with a foam roller. The paint does not have to be black – you can choose from a variety of colors. If you talk to your local paint store representative, they may even have magnetic paint to use as well. I like to call those a “2-for” (2 for the price of 1).
DIY Tip:
One thing I found was dustless chalk – it didn’t make sense to me either, but I bought it and used it.
Enjoy the finished product
Now, you have a DIY chalkboard menu. You can write or draw your holiday menu for all to “ooh” and “aww” over. You deserve it! Lean it up, place it on a buffet table or place it wherever suits you best. Add a flower arrangement or other decorations you have and voila – you are killing it this holiday dinner!
Tips, Tricks, Hints & Hacks: Painting
Painting, depending on the scale of your project, can be an intimidating task – any small thing to help lighten the load can feel like a god-sent, whether it’s as simple as an easy clean-up method or a savvy shortcut to bring on the savings. I’ve put together a list of some of my favorite hacks that will have your room ready in record time and they’ll take the pain out of painting.
When you open a can, use a nail and hammer to create a small hole on the inside of the rim that will allow excess paint to drip back into the can. This will help prevent build-up of paint from dripping down the outside of the can and also ensure you maximize the use of your paint.
If you’re using a paint roller and need to take a break overnight, you can seal your still-wet roller in an empty Pringles container (EMPTY washed out with crumbs removed), which will prevent it from drying out. And, brushes can be stored in a large zip lock plastic bag.
Taping off the often awkward angles of a doorknob can be a frustrating task. Save the headache and use aluminum foil to cover and protect doorknobs or other handles/hardware. You can also use press–and-seal plastic wrap to protect similarly awkward areas or immoveable fixtures/furniture in your home.
If you do get paint on a hard surface, use a cleaning wipe (they should be back in stock at your local store – along with any toilet paper you have been unable to find) to remove it. The alcohol found in them won’t damage most surfaces (a spot test is recommended) and is great for breaking down latex paints.
Sometimes the messiest part of painting ends up being the aftermath, when days later you’re still finding small dollops of paint in the nooks and crannies of your skin. Coating your body in lotion prior to your post-painting shower will help make these patches easier.