

Written by Lauren Robuck
THE TREE
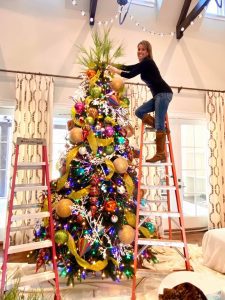
- Invest in a high-quality artificial tree: The look and feel of a high quality tree is everything to us as a designer, it makes it look real and it easier to work with… and it lasts way longer than less expensive trees.
- The hard part – Fluff and shape branches: This is a very important job…If the tree is not shaped and branches pulled apart, then there are “holes” in the tree that make it harder to decorate. This is usually the first step we do, pull apart and bend the branches.
 Pick a design theme: We usually ask the client what design theme they want to do… match the style of their home, traditional red and green, whimsical, formal, fun colors, etc. This is strictly up to the client. Every house we do is different; every client is different, and we want our designs to reflect the client and their home.
- Lights done right: Prelit trees are the best!!! The higher the light count the better! And the color of the bulbs is very important, you need a “warm” white light, not a “blue” white light
- Tree topper: This is one of the things that “makes” the tree. We use several different types of “glitter branches” usually 2-3 feet tall. This really adds a nice height to the tree. We decide how big to make it according to how tall the tree is and how tall the ceilings are. We usually start this first.
- Layer and style ribbons: We start with a “glitter” or matte garland. This is usually 6 feet long and a type of eucalyptus or bay leaf in the red, lime, gold, or silver color. This fills up the tree very nice and adds so much! We tuck it in and out of the tree to give it depth. Then we add a ribbon in whatever color goes best with the ornaments. We swirl, loop, and twist the ribbon starting at the top of the tree.
- Cluster décor and ornaments in a somewhat uniform way: We start with the biggest ornament, one type of color, or one type of ornament. Nothing is ever in a straight line. We stagger ornaments so it doesn’t look too “fixed.”
- Tree picks to fill in gaps: This gives the finishing touch to any tree, the “twist” as I like to call it. Every tree needs something sticking out of it to give it life! We use a solid color branch, swirlies, balls, etc., according to what style the tree is.
- Balance the decorations: This is a HUGE thing to do. If it is not placed correctly, the tree can look off-balance and too “fixed” or “decorated.”
- The tree skirt and wrapping paper: I like to use a simple tree skirt so it doesn’t stand out or clash with the theme of the tree. And same with the wrapping paper. If it is a very ornate tree, you need simple paper. If it is a fun, whimsical tree, you can use a polka dot or fun paper.
 Pick a design theme:
THE MANTLE/FIREPLACE
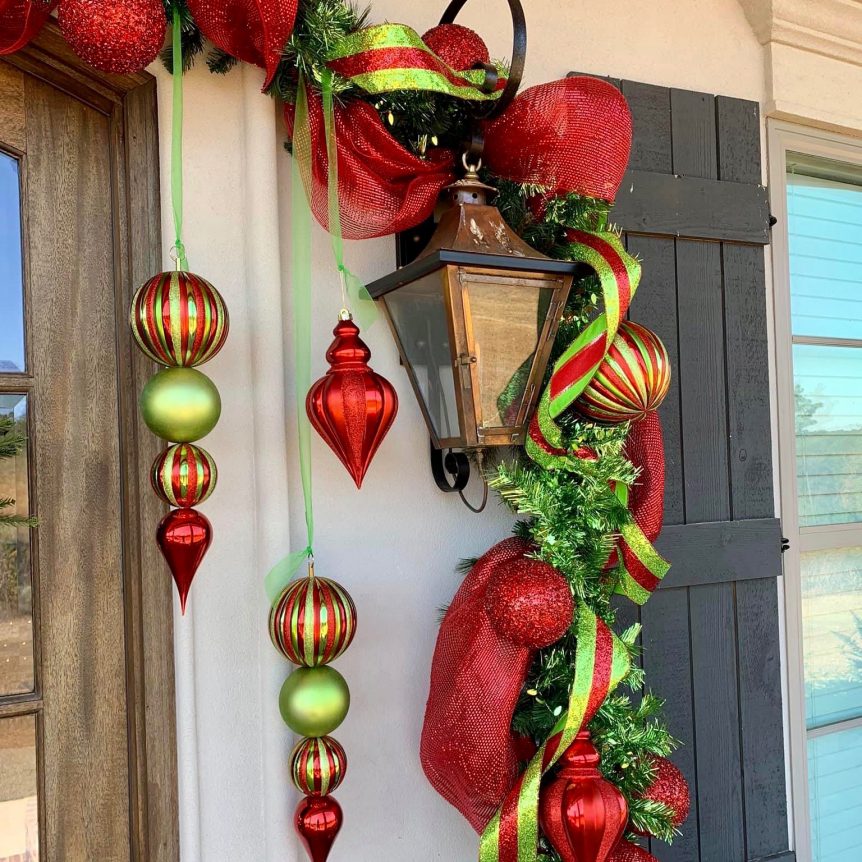
- Garland and lights: Thick prelit garland with long needles and multiple types of greenery is the best, it looks more natural. I love to use a mixed fir and eucalyptus garland. Some clients prefer some garlands with red berries in it also. Depending on how long and big the mantle is is how we determine the design. You can do it symmetrical all the way across or you can do an asymmetrical design. You can swoop it down, or go straight across.
- We select a “glitter” or matte garland to be woven in next and sometimes a ribbon or a ball garland.
- Secure ornaments: This is very important so nothing falls. We place them all throughout the garland so it will have depth.
- Hide the plugs.
- Hang the stockings with care: You want your stockings to match your Christmas décor so they blend and not clash. Stockings are one of my favorite things about Christmas! I have several in my home. Some are hand made by my grandmother and are whimsical and fun, so I place those in an area that is fun and goes with the décor.
IT’S ALL ABOUT THE DETAILS
-
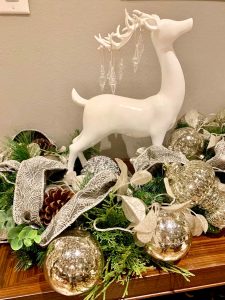
Where to add extra sparkle and shine: One of my absolute FAVORITE things is to adorn the chandeliers! Over a dining room table looks so beautiful with garland and mixed greenery with a touch of ornaments. A large chandelier in a living room with tall ceilings looks so cool with long finial type ornaments hanging. It just adds a “twist” to the décor. It seems to finish off the room.
-
Another place is to add Christmas silk florals to the coffee table or side tables. You need something so it pulls the Christmas decorations all throughout the room.
- Placing apothecary jars on an island filled with different things is a really cute way to display Christmas in the kitchen. I usually do one filled with a layer of peppermints and marshmallows, one with ornaments, one with ribbon, one with red and green M&Ms.
-
All the “extra” details really make a huge difference. Whether doing a simple tree and mantle or whether doing the entire house, the details matter! We can give tips on how to make it look like a designer decorated house, it’s all in what is purchased to decorate. The more the better, but not in a gaudy way, in a simple way. When clients come in… I tell them exactly how much of an item to purchase and how to put it up. I love that some people still love to decorate their own house and I am here to help them in any way! We try to make Christmas less stressful and fun! We have a full assortment of the mixed garlands in prelit and unlit, glitter garlands, tons of ornaments in all shapes, sizes and color and lots of different “sticks” to finish off the tree!
If you want the designer look, but don’t have the time to do it yourself, Lauren Roebuck Designs can help. Lauren and her team are available for custom holiday decorating.
318-512-1368
laurenroebuck.com