

Jessica Comegys
I don’t know about you, but I often go on information quests, not stopping until I know everything. Most times this is helpful, other times… ignorance is bliss. But if you want to impress your friends with knowledge about the exotic raw oyster at the next dinner party, here are the answers to your most pondered questions.
MYTH: You should eat oysters only in months with an ‘R’ in the name
There’s always been this oft-recited piece of advice about oysters: Only eat oysters in months that contain the letter “R” in the name. You know, September, October, December, January. Not June, July, August. The idea that you shouldn’t eat oysters from May through August probably started in the days before refrigeration. Today’s oysters go from water to ice and then to a refrigerated truck, so that’s no longer a concern. The summer is also when many oysters reproduce, which means they may be milky when they’re spawning and thin right afterward and neither option makes for great eating. Many oyster farmers raise some sterile oysters, so spawning isn’t an issue.
FACT: Eaten Alive
Fresh oysters must be alive just before consumption or cooking. There is only one criterion: the oyster must be capable of tightly closing its shell. Open oysters should be tapped on the shell; a live oyster will close up and is safe to eat. Oysters which are open and unresponsive are dead and must be discarded.
FACT: What do Oysters Eat?
Oysters eat phytoplankton or small bits of algae suspended in the water. They are filter feeders, which means that they obtain their food by filtering water in and over their gills.
 MYTH or FACT: Aphrodisiac? You be the judge.
 MYTH or FACT: Aphrodisiac? You be the judge.
It wasn’t entirely based upon science, though some foods possess chemical properties that could increase testosterone or estrogen levels, thereby increasing sex drive, others are considered sexy purely because of their appearance. The Food and Drug Administration maintains that aphrodisiacs are myths with no basis in science. However, Casanova, the 18th century lover who used to breakfast on 50 oysters, has been vindicated by a study that proves they really are aphrodisiacs. In March 2005, American and Italian scientists announced that there is some truth to the idea that bivalves can get folks all hot and bothered. And spring, the scientists say, is the time of year the shellfish have their greatest aphrodisiac quality.
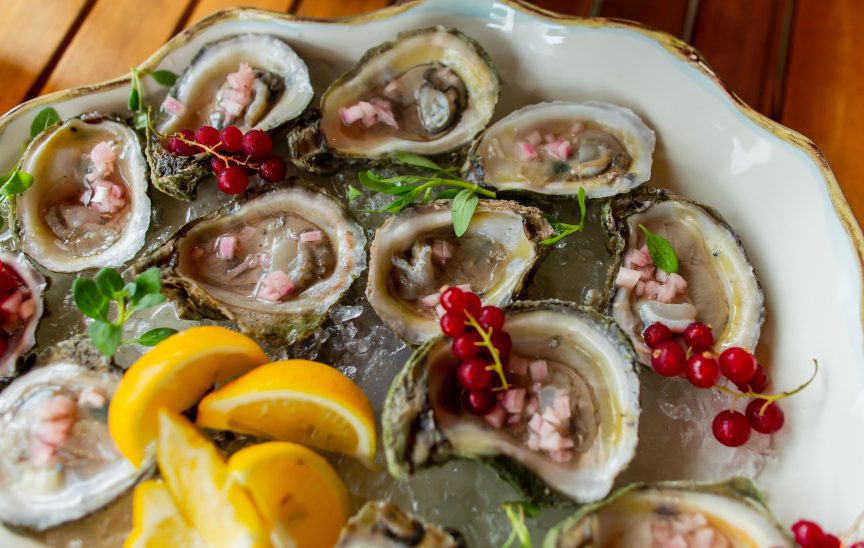
FACT: Green Gills
If you come across an oyster with green-tinted gills, like the ones as shown above, consider yourself lucky. The greenish color comes from a particular type of blue diatom that the oysters are eating. It’s not harmful to eat an oyster like this, and in fact, its flavor is highly sought after. It has been found to have powerful antioxidant, antibacterial and antiviral properties. Perhaps the green oyster is our super sexy superfood?
YES I said Superfood!
Oysters are naturally one of the most nutritionally well-balanced of foods. They are low in fat, calories and cholesterol in addition to being high in protein, iron, omega 3 fatty acids, calcium, zinc and vitamin C.
BUYING OYSTERS
• Buy them from reputable sources. Trust who you’re buying them from, and make sure they look clean and are stored properly, like on ice.
• Look at labels. By law, oysters need to be labeled with where they came from and harvest dates. Don’t be afraid to ask!
• Buy heavy oysters. They should be heavy for their size, just like fruit. If they feel light or sound hollow when you rap them, don’t buy them.
• Store them properly. Put raw, unshucked oysters in a bowl in the refrigerator. Cover them with a damp dish cloth so they don’t dry out. They don’t have to sit on ice, but make sure the refrigerator temperature is around 38 or 39°F. ‘R’ stands for refrigeration these days.
EATING OYSTERS
• Don’t wait. Eat oysters within a week of harvest in the summer, and within 10 days in the winter.
• No mud. If you see mud in the shell after you shuck an oyster, pitch it.
• Don’t spill the liquid. You want the juices or “liquor” of the oyster to stay in the shell until you eat it, so after shucking oysters, place them on plates in a way that the shell doesn’t tip and spill any of the liquid out. Place oysters on the half shell on plates lined with ice or coarse salt so they stay put.
OPENING OYSTERS
 1. Insert the knife between the shells & twist. Look at the oyster — he vast majority of oysters are going to have a cupped side and a flatter side. Hold the oyster with the flatter side up. The cupped side will hold the oyster and its liquid while you shuck. Now look for the hinge — that point where the shells are joined in a more serious way that just being held together by the muscle that is the oyster.
2. Slide the knife between the shells. Once you’ve popped the hinge open, slide the knife between the shells, keeping it along the bottom of the top shell — you don’t want to mangle the oyster! Most of this sliding will be very easy,
but the point where the oyster is attached to the top shell will provide some resistance you’ll need to cut through.
3. Open it up! You’ve now separated the two shells that house the oyster. Remove the top shell (if there is a lot of meat attached to it, use the knife to cut (or, really, scrape) it off. Through all of this, try to keep as much of the liquid (oyster liquor) in the shell as possible. It’s delicious.
Oysters Champagne Mignonette
12 oysters, shucked
1⁄4 cup champagne
2 tablespoons champagne vinegar
2 teaspoons shallots, finely chopped
Fresh cracked pepper
Lemon wedges, optional
Freshly grated horseradish, optional
Crushed ice, to keep oysters cool
• Combine champagne, vinegar, shallots and pepper in a small bowl and set aside.
• Arrange shucked oyster on a plate covered with crushed ice. Serve with champagne mignonette and optional lemon
wedges and horseradish.
• Enjoy, preferably with a glass of champagne!
Lemon Tart
 A flaky puff pastry tart filled with lemon cream and topped with fresh raspberries. An easy and elegant spring or summer dessert.
• Puff Pastry Crust: Simply roll out a sheet of store bought puff pastry and score a border around the outside edge. While the puff pastry bakes the outer edge will puff up and create a space in the center to fill with the lemon cream filling.
• Lemon Cream Filling: Fold together whipped cream, cream cheese (softened), lemon zest, and lemon curd for this easy no bake filling.
• Raspberries: I topped this Lemon Tart with fresh raspberries, but you can add any fruit you like. Blueberries or sliced strawberries would be great, as would a combination of berries.
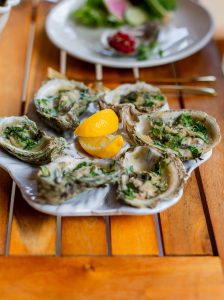
Chargrilled Oysters
Oysters on the half shell done NOLA style, filled with a lemony, garlicky, butter sauce that are topped with cheese and chargrilled until the cheese has melted and turned golden brown. (Serve with crusty bread to soak up all of that buttery saucy goodness!)
1 stick butter, room temperature or melted
2 cloves garlic, grated
2 tablespoons lemon juice (~1/2 lemon)
1 teaspoon Worcestershire sauce
1⁄4 cup pecorino romano or parmigiano reggiano (parmesan), grated
salt, pepper and cayenne to taste
1 tablespoon parsley, chopped
12 oysters on the half shell
1⁄2 cup pecorino romano or
parmigiano reggiano (parmesan), grated
2 tablespoons parsley, chopped
• Mix the butter, garlic, lemon juice, Worcestershire sauce, cheese, salt, pepper, cayenne and parsley and set aside.
• Place the oysters on a preheated 350F/180C grill, let cook until the juice start to bubble, spoon in ~1 tablespoon of the butter mixture onto each oyster, sprinkle on the cheese and cook until the cheese is golden brown.
• Sprinkle on the parsley and serve immediately with extra butter, lemon wedges, hot sauce and bread.
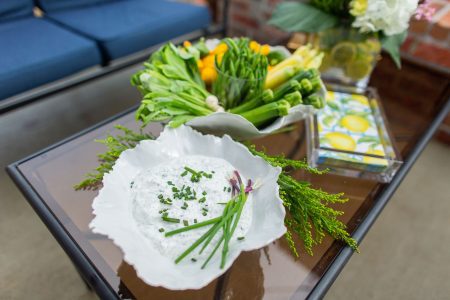
Green Goddess Dip
 1 1⁄2 cup of thick greek yogurt or vegan cream cheese
1⁄2 cup loosely packed fresh flat-leaf parsley leaves
1 tablespoon chopped fresh tarragon
2 teaspoons white wine vinegar
1 teaspoon anchovy paste
1 teaspoon lemon zest
1 tablespoon fresh lemon juice
2 garlic cloves, minced
1⁄3 cup chopped fresh chives
Salt and freshly ground pepper to taste
• Process first 9 ingredients in a food processor until smooth, stopping to scrape down sides if needed.
• Stir in chives; season with salt and pepper to taste.
• Cover and chill 2 to 24 hours.
• Serve with assorted vegetables.
Spring Pea Salad
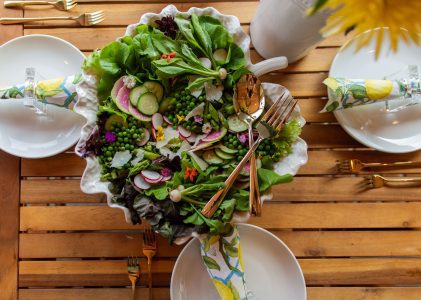 3-4 cups various farmers market lettuce
3-4 Persian Cucumbers, thinly sliced
2 Avocados, cut into wedges or cubes
2-3 radishes, thinly sliced
1 Bunch asparagus spears, blanched and cut into 1 inch stalks
1 cup fresh peas, blanched
Sea salt and pepper
Basil Vinaigrette
• Add everything for the vinaigrette to a blender and blend for 3 minutes until completely smooth.
• Arrange the lettuce on a large platter or bowl.
• Scatter the cucumbers, avocados, peas, asparagus and radishes on top and season with salt and pepper.
• Serve alongside the Basil Vinaigrette
Basil Vinaigrette
1 shallot, roughly chopped
2 cups tightly packed fresh basil leaves, stems removed (about 4 ounces)
1 clove garlic
1⁄2 teaspoons red pepper flakes
1⁄2 cup olive oil
2 tablespoons red wine vinegar
1 teaspoon salt
• Combine all the ingredients for the basil vinaigrette in a high powered blender and blend for 60 seconds until very smooth.
• Taste and adjust salt and pepper as needed.
• Serve immediately or refrigerate the vinaigrette for up to 3-5 days.